How We Produced an 8-Hour Vintage Train Soundscape (The Exact Workflow)
Faceless YouTube · 16 min read
Most articles about producing soundscapes for YouTube stay vague at exactly the moment they should get specific. They tell you “use AI to generate B-roll” without saying which AI, with which prompts, for how long. They tell you to “loop your audio to fill the runtime” without explaining how. They suggest you “master your audio properly” without saying what mastered audio actually is.
This is the opposite of that. We recently produced an 8-hour vintage train soundscape video — title: “Vintage Train Sounds for Sleep 🚂 8 Hours of Rhythmic Wheels & Distant Horns | No Music, No Ads” — using the £4/month stack we documented in How to Start a Faceless Soundscape Channel on £4/Month. Here’s the entire workflow that produced it. Specific. Reproducible. With the tools we actually used and the prompts that actually worked.
If you’ve been considering a soundscape channel and the production side feels opaque, this article should make it concrete. You don’t need expensive software. You need maybe six hours of focused work for the first video, dropping to under two hours by video five.
The total budget
Before the workflow itself, the honest accounting of what we spent to produce this one video:
- ElevenLabs Starter — £4/month (used for the spoken intro narration, ~60 seconds)
- Kling AI — £8/month (used for AI-generated B-roll clips when stock footage didn’t match the vintage train aesthetic)
- CapCut Pro — £8/month (for editing and assembly)
- Audacity — £0 (for audio layering and mastering)
- FFmpeg — £0 (for extending the middle audio loop to 8 hours)
- Pixabay and Freesound — £0 (free audio stems for the train sounds)
Roughly £20 for a month of subscriptions, used across multiple videos. The marginal cost per additional video on this stack is approximately zero. Over a year of weekly publishing, that’s £240 in tooling for 52 videos — about £4.60 per video.
Step 1: Source the train audio (45 minutes)
The starting point for any soundscape video is the audio itself. For vintage train sounds specifically, the most useful sources are:
- Pixabay’s free sound effects library — search “vintage train,” “steam train,” “train interior,” “wheels on tracks.” High-quality recordings, no attribution required, fully commercial-use licensed.
- Freesound.org — under CC licenses (check each clip’s specific licence — some require attribution, some don’t). Best for distinctive sounds like distant horns and steam whistles.
- Zapsplat — free with attribution. Best for longer 1-3 minute stems where you’d otherwise need to layer many shorter clips.
Download 5-8 different stems. The combination you want for vintage train:
- Rhythmic wheels on tracks — your base layer, 30-90 seconds long ideally, with clear rhythm
- Gentle carriage creak/rocking — adds the wooden, lived-in feel
- Distant steam horn calls — occasional, evocative, gives the audio rhythm a sense of place
- Soft ambient air rush — fills the high-frequency space without being intrusive
- Optional crowd murmur or interior sounds — for the “you’re inside the carriage” feel
You’re not picking the best one. You’re picking five different sounds you’ll layer on top of each other in Step 2.
Step 2: Layer and master the audio in Audacity (60 minutes)
Open Audacity. Import each of your 5-8 stems as separate tracks (File → Import → Audio).
The layering principle: loop each track at a different length so the combination never repeats predictably. If your wheels-on-tracks track is 45 seconds, loop it for the full duration. If your horn track is 90 seconds with one horn call, loop it too. The two tracks will fall out of sync by 45-second offsets each loop, meaning the combined audio never sounds identical from minute to minute. This is what stops 10 minutes of audio from sounding obviously looped to listeners’ ears.
Volume balance: the base wheels track should be roughly -12dB on its meter. The carriage creak should be -18dB to -20dB (audible but in the background). The distant horn should be -22dB to -24dB — present but never dominant. The ambient air should be -24dB or lower.
The mistake almost every new soundscape producer makes: making the audio too loud. Sleep listeners want audio quiet enough that they could fall asleep with the volume set comfortably and not have it wake them up. Master conservatively.
Then master to -16 LUFS. This is the YouTube standard for sleep content. YouTube auto-normalises loud audio, but the algorithm specifically rewards sleep content mastered at conservative volumes. Use Audacity’s Effect → Loudness Normalization. Set Integrated LUFS target to -16. Hit OK.
Export as 10 minutes of WAV. That 10-minute file is your “middle” — it’ll loop to fill the 8-hour runtime later. Export at 48kHz, 16-bit. File → Export → Export as WAV.
You now have one finished audio file. You will not touch it again. The remaining work is video.
Step 3: Generate the AI video intro clips (60-90 minutes)
The first 60 seconds of the video is where viewers decide whether to stay. It needs to feel cinematic and clearly establish “vintage train.” We used Kling AI for this because it generates 5-second clips faster than CapCut’s built-in generator (about 1-3 minutes per clip vs CapCut’s much slower turnaround for similar quality), and at $10/month is the cheapest of the credible AI video tools.
These were the eight prompts we used. Each generates a 5-second clip. They’re ordered to create a visual flow from establishing shot to close-up to fade-to-darkness:
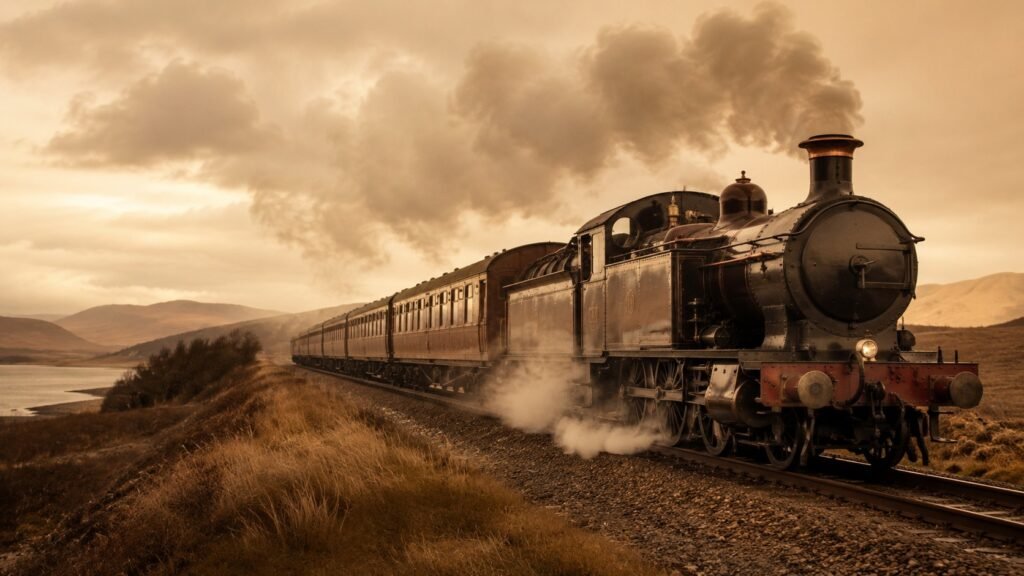
Clip 1 — Establishing shot, wide:
A vintage 1940s steam locomotive seen from outside, slowly emerging from morning mist, cinematic wide shot, warm sepia color grading, soft golden hour light, gentle steam clouds drifting, slow forward camera dolly, shallow depth of field, photorealistic, nostalgic atmosphere, no people, no text
Clip 2 — Side view, train moving:
A vintage passenger train passing through rolling green countryside in 1940s era, side-on tracking shot following the train, warm afternoon light, soft motion blur on wheels and steam, cinematic 35mm film aesthetic, muted earthy color palette, no people, no text overlays
Clip 3 — Wheels on tracks, close-up:
Extreme close-up of vintage steel train wheels rolling on iron tracks, rhythmic motion, polished brass fittings catching warm light, soft motion blur, slight steam at edges of frame, cinematic depth of field, photorealistic detail, slow-motion feel, earthy sepia tones, no text
Clip 4 — Carriage interior, empty:
Interior of a vintage 1940s train carriage, empty velvet seats, warm wood paneling, brass luggage racks, soft daylight streaming through windows, gentle camera movement forward down the aisle, dust motes visible in light beams, nostalgic atmosphere, photorealistic, no people, no text
Clip 5 — Window view:
View through a vintage train window, blurred countryside racing past, soft window reflections, warm afternoon light, gentle vibration of glass, rolling hills and trees in motion blur, cinematic depth, muted nostalgic colors, sepia warmth, no people, no text
Clip 6 — Steam billowing:
A vintage locomotive belching white steam against a soft pastel sky at golden hour, side tracking shot, dramatic but gentle composition, warm light, photorealistic film aesthetic, slow cinematic motion, earthy palette of browns greens and ambers, no people, no text overlays
Clip 7 — Distant train, fading into mist:
A vintage train traveling away into the distance, viewed from a slight elevation, gentle mist enveloping the carriages, dimming warm light suggesting dusk, slow camera pullback, melancholic but peaceful mood, cinematic widescreen, muted faded tones, no people, no text
Clip 8 — Slow fade to darkness:
A vintage train carriage interior gradually fading from warm dim light into complete darkness, slow fade, soft brass and wood textures dissolving into black, melancholic peaceful mood, cinematic transition, ending in near total black frame, no text
A practical note: AI video generators are non-deterministic. Running the same prompt twice produces different output. Plan for 2-4 regenerations per clip before you get one that’s clean — no spurious modern objects, no warped perspective, no weird artifacts. Eight clips at three average regenerations is 24 generation runs. At ~2 minutes per run, that’s roughly 50 minutes of wall-clock time, most of it waiting.
Save each accepted clip immediately as you generate it. AI generators sometimes lose your history.
Step 4: Generate the spoken intro using ElevenLabs (15 minutes)
The video opens with a calm spoken intro setting the scene. Ours was four sentences:
“Settle in for eight hours of vintage train sounds. The rhythmic clack of wheels on tracks, the gentle rocking of the carriage, distant horns through the night. No music. No interruptions. Just the train.”
Generate this through ElevenLabs Starter using a calm, slow male or female voice. Recommendations from the standard voice library:
- For male voices: “Adam” (calm, slightly older), “Daniel” (deeper, slower)
- For female voices: “Bella” (warm, narrative), “Charlotte” (soft, accented)
Set the stability slider to about 75% and the similarity-boost to about 60%. Higher stability = more consistent, less expressive — which is what you want for a sleep intro. The voice shouldn’t sound performative.
Generate. Listen back. Re-generate if the pacing is wrong (ElevenLabs sometimes rushes; punctuation matters). Export as MP3 or WAV.
The total character count is about 250 characters — well under the 30,000/month Starter limit. You can produce 100+ videos at this length on a single Starter subscription without ever hitting the cap.
Step 5: Create the text card (10 minutes)
After the visual intro fades to darkness, but before the audio takes over, a calm text card appears for 15-20 seconds. The exact text we used:
Settle in.
You can close your eyes now.
The visuals end here so nothing competes with the sound.
Eight hours of vintage train. No music. No interruptions.
Build the text card directly in CapCut. Use a serif font (Cormorant Garamond or similar) in soft off-white (#e8e2d4 — same colour family as our brand). Centre-aligned. On a deep navy or pure black background. Fade in over 3 seconds, hold for 15 seconds, fade out over 3 seconds.
This card serves a real purpose. It tells the viewer that the absence of visuals from this point onward is intentional. Without it, some viewers will think the video is broken and click away. The card explicitly signals: “from here, just listen.”
Step 6: Generate the 8-hour black middle file (5 minutes)
You need a long black video file that runs for the duration of your audio. Don’t render this in CapCut — it’ll take hours of render time and produce an unnecessarily large file. Use FFmpeg instead.
Open a terminal. Run this command:
ffmpeg -f lavfi -i color=c=black:s=1920x1080:r=30:d=28800 -c:v libx264 -tune stillimage -pix_fmt yuv420p black-8hours.mp4
Breakdown of what this does:
color=c=black:s=1920x1080:r=30:d=28800— generates a 1080p 30fps video that’s 28,800 seconds (8 hours) long, in pure black-tune stillimage— tells the encoder to optimise for static content (no motion to compress, so the file size stays tiny)-c:v libx264 -pix_fmt yuv420p— standard H.264 codec settings that YouTube prefers
The result is a single MP4 file, around 200-400MB despite being 8 hours long. Generation takes about 3-5 minutes on a reasonable laptop.
Step 7: Assemble everything (90 minutes for the first video)
Now you have all the pieces:
- 8 short AI-generated video clips (5 seconds each, ~40 seconds total)
- 1 spoken intro audio file (~15 seconds)
- 1 text card (built in CapCut, ~20 seconds with fades)
- 1 eight-hour black video file
- 1 ten-minute mastered audio file (the soundscape itself)
Assembly in CapCut:
- Place the 8 video clips on the timeline, end to end. Apply 1-second crossfade transitions between each. Total duration: approximately 40 seconds with crossfades reducing it slightly.
- Add the text card after Clip 8, with fade-in/hold/fade-out. Now your video opening runs from 0 to ~75 seconds.
- Append the 8-hour black file after the text card. Your video’s visual track is now 8 hours long.
- Add the spoken intro audio on a separate track, starting at about second 5 (giving the first clip time to establish). Fade in over 1 second, fade out over 2 seconds when it ends.
- Add the soundscape audio on another track, starting from the very beginning. It should be quietly audible during the spoken intro (about -24dB), then ramp up to full volume (the mastered -16 LUFS level) as the spoken intro ends and the text card appears.
- Loop the soundscape audio to fill the full 8 hours. CapCut handles this by extending the audio clip on the timeline — drag the right edge to extend. The 10-minute file will loop 48 times to cover the runtime.
- Add a 10-20 second fade-out on the audio at the very end, so the video doesn’t cut off abruptly.
Total assembly time for the first video: 60-90 minutes. By video 5, you’ll have built CapCut templates and presets that compress this to 20-30 minutes.
Alternative: use FFmpeg for the assembly. We documented a reusable batch script that takes intro + middle + outro and concatenates them in one command. Faster than CapCut for repeat productions. [The full script and instructions are documented separately.]
Step 8: Export (3-6 hours, hands-off)
Export settings that work for YouTube sleep content:
- Resolution: 1080p (don’t bother with 4K — the visuals are mostly black and the file size cost isn’t worth it)
- Frame rate: 30fps
- Codec: H.264
- Bitrate: ~8 Mbps (CapCut’s “High” quality preset is fine)
- Format: MP4
The resulting file will be roughly 25-40GB. Export time on a typical laptop: 3-6 hours. Set it running overnight. Don’t run other heavy applications while it exports — give CapCut the full CPU and the export finishes faster.
Step 9: Thumbnail (30 minutes)
The thumbnail does more for views than almost anything else in the production. For sleep content, the design principles are tight:
- A single atmospheric image. Don’t try to combine multiple elements. One striking visual.
- Title text overlaid in serif font. Cormorant Garamond, Playfair Display, or similar. Centred or left-aligned.
- Limited colour palette. Dark backgrounds with warm accents. Avoid bright reds, oranges, yellows — these don’t fit the sleep aesthetic.
- Readable at thumbnail size. Most viewers will see your thumbnail at 240×135 pixels. Text and image both need to work at that scale.
We built ours in Canva Free using a single AI-generated image of a vintage train in golden-hour mist, with the title overlaid in white serif text. About 30 minutes of iteration to land on something that read well at small sizes.
Step 10: Upload, title, description, tags (30 minutes)
The title we used: “Vintage Train Sounds for Sleep 🚂 8 Hours of Rhythmic Wheels & Distant Horns | No Music, No Ads”
This title structure is intentional:
- Primary keyword first — “Vintage Train Sounds for Sleep” is what people search
- Single emoji — increases click-through at thumbnail scale; one is enough
- Specific duration and content description — sets expectations honestly
- The “No Music, No Ads” suffix — rare in this niche, builds trust before the video even plays
The description follows a standard pattern: a bolded one-line summary at the top (which appears in search snippets), then “what you’ll hear,” then “best uses,” then channel context, then hashtags. We documented the full description template in a separate piece on soundscape SEO.
Tags should mix high-volume keywords (#sleepsounds, #8hoursofsleep) with niche-specific ones (#vintagetrainsounds, #trainasmr). Limit to ~12-15 hashtags.
Category: Music. This is the right primary category for sleep content even though no music is in the video — YouTube’s algorithm indexes sleep content as a music subset and ranks it accordingly.
Schedule the upload for Sunday evening, 7-9pm in your audience’s timezone. This is the highest-engagement window for sleep content because viewers are settling in for the week.
What we’d do differently next time
A few honest reflections on what we’d refine for video #2:
Generate B-roll clips in batches, not one at a time. Running prompts sequentially and reviewing each before moving to the next wastes time on the wait. Better to fire off 12-16 prompts in parallel, then review the whole batch and pick the best 8.
Build the text card as a CapCut preset before starting. We rebuilt it from scratch. By video 2, a saved preset means dropping the card in one click.
Master the audio at -16 LUFS exactly, not by ear. We tweaked by ear and ended up at -15.4 LUFS. Use a meter from the start.
Don’t include a Pixabay clip and an AI-generated clip side-by-side in the intro. The visual style mismatch is noticeable. Either go all-stock or all-AI. We mixed them in the first video; it’s marginally better to commit to one.
Plan the audio sourcing in advance. Sourcing and licensing the audio is the part most likely to derail the production. Identify 5-8 specific clips before you sit down to produce — don’t search and decide in the moment.
The compounding payoff
The first video took about 6-7 hours of focused work end-to-end. The second video — using the templates and presets built during the first — takes 2-3 hours. By video 5, the routine compresses to 90 minutes.
That’s the real payoff of the £4/month stack approach. The tools don’t get faster. You get faster. By video 20, you’re producing more cheaply and faster than someone with a £200/month stack who hasn’t built their workflow.
The first video is also genuinely a different experience to make than the tenth. You learn what works in your specific niche. You discover which audio sources you trust. You build a vocabulary of prompts that produce reliably good clips. None of that is reproducible from an article — including this one. The article tells you the workflow; the practice teaches you the craft.
Want the full faceless YouTube starter kit, including the £4 stack PDF, the 30-day launch plan, and the 50-prompt library for thumbnails and descriptions? Free download in the Hidden Hustles Starter Kit. No upsells.
ElevenLabs and Kling AI are affiliate partners; we earn a small commission if you sign up via our links. We use both for our own production. CapCut, Audacity, FFmpeg, Canva, Pixabay, and Freesound are not affiliated with us. See our affiliate disclosure for more.